Technology
Preparing Your Home Electrical Panel for an EV Charger
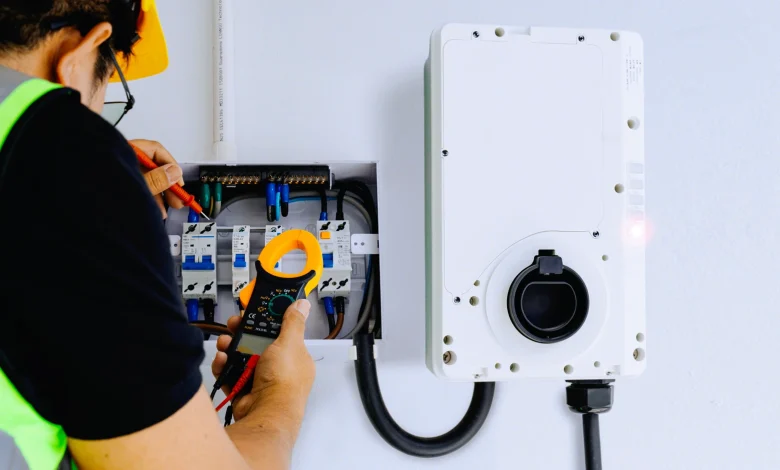
Bringing an electric vehicle home changes how you think about everyday fueling. The routine of stopping at a gas station every week or two disappears, replaced by the convenience of plugging in overnight and waking up to a full battery. For most new owners, however, the real surprise arrives before the car even pulls into the driveway: the realization that a standard three-prong wall outlet barely adds three to four miles of driving range per hour of charging.
Relying on a 120-volt Level 1 outlet might work for a plug-in hybrid with a tiny battery or a vehicle driven exclusively on short neighborhood errands. For a modern long-range battery electric vehicle, a 240-volt Level 2 charging station is practically a necessity.
Installing a Level 2 charger is not simply a matter of mounting a sleek unit on your garage wall and plugging it in. Your home electrical panel is the central nervous system of your entire electrical system, and adding a major continuous appliance requires assessing capacity, physical breaker space, and wiring requirements. Preparing your panel properly ensures that your vehicle charges quickly, your home operates safely, and your electrical infrastructure remains fully compliant with residential building codes.
Understanding What a Level 2 Charger Demands from Your Home
Before you examine your breaker box, you need to understand the electrical profile of residential electric vehicle supply equipment. An electric car is not like a microwave or a coffee maker that draws electricity for a couple of minutes and shuts off. It draws a large amount of power continuously for several hours at a time, typically while the household is asleep.
Electrical standards categorize any draw that runs at maximum current for three hours or more as a continuous load. Under the National Electrical Code, continuous loads require an electrical circuit rated for 125 percent of the continuous draw. In simple terms, your equipment can only consume 80 percent of the circuit breaker’s rated capacity:
A 32-amp charger requires a dedicated 40-amp circuit breaker.
A 40-amp charger requires a dedicated 50-amp circuit breaker.
A 48-amp charger requires a dedicated 60-amp circuit breaker.
Most residential Level 2 chargers operate between 32 and 48 amps. Adding a 40- to 60-amp 240-volt circuit to your home is roughly equivalent to adding a second central air conditioning unit or a commercial-grade electric range. Your electrical service must have enough headroom to supply this steady stream of electricity alongside your existing appliances without overheating conductors or tripping the main breaker.
Capacity vs. Space: The Two Hurdles Inside Your Breaker Box
When homeowners open their breaker cabinet, they often look for open physical slots. If they see two empty knockouts where a double-pole 240-volt breaker can snap into place, they assume their home is ready for installation.
Physical space and electrical capacity are two completely different things.
A panel can have plenty of empty slots while running dangerously close to its total amperage limit. Conversely, a panel might have substantial spare electrical capacity from the utility company while having every physical breaker slot occupied by small 15-amp and 20-amp lighting and outlet circuits.
Homes built in the 1960s, 1970s, or 1980s often operate on 100-amp or 125-amp main electrical service. If your home uses natural gas for heating, water heating, cooking, and clothes drying, a 100-amp panel might accommodate a modest 30-amp or 40-amp EV circuit. However, if your home is fully electric—relying on a heat pump, electric resistance furnace, electric water heater, range, and dryer—a 100-amp service will almost certainly be pushed beyond safe operational limits during peak evening hours.
Modern homes typically feature 200-amp main service panels, which offer far greater flexibility. Yet even on a 200-amp panel, high-draw amenities like pool heaters, hot tubs, secondary air conditioning units, or home workshops can consume available capacity faster than expected.
Conducting a Realistic Residential Load Calculation
Determining whether your electrical system can support a vehicle charger requires a formal load calculation. Many homeowners make the mistake of adding up the numbers printed on every individual breaker handle in the box. A 200-amp panel might hold thirty breakers whose individual ratings total 400 or 500 amps.
This total does not indicate that the panel is overloaded. Residential systems rely on the principle of diversity: you never run your oven, toaster, hair dryer, air conditioner, washing machine, and vacuum cleaner at the exact same second.
A licensed electrician performs a calculation that takes into account the square footage of your home, the dedicated circuits required by building code for kitchens and laundry rooms, and the nameplate ratings of fixed motor loads and heating equipment. Specific demand factors are applied to reflect realistic concurrent usage.
Once existing loads are calculated, the electrician compares that baseline to the rating of your main service entrance conductors and main breaker. If the calculation reveals that adding a 40-amp or 50-amp continuous circuit leaves insufficient margin, you have several distinct paths forward.
Modern Pathways to Panel Readiness
If your current electrical setup cannot immediately support the charger you want, you are not out of options. Depending on your home age, utility infrastructure, and budget, several solutions can bridge the gap between your existing panel and your charging needs.
Upgrading to a 200-Amp Main Service
When a home runs on an outdated 60-amp or 100-amp service, a complete service upgrade is often the cleanest and most future-proof solution. This process involves more than swapping out the breaker box on the wall.
A full service upgrade typically requires replacing the external meter socket, running larger service entrance cables up through the weatherhead or down into the underground utility conduit, installing a modern exterior emergency disconnect, and replacing the interior panel with a 200-amp unit featuring plenty of circuit spaces.
While this carries a higher initial investment and requires coordinating permits and service cutoffs with your local electric utility, it permanently modernizes the electrical foundation of your property. It provides immediate capacity for vehicle charging while leaving room for future electrification, such as swapping a gas furnace for a high-efficiency heat pump.
Installing a Subpanel or Tandem Breakers
If your load calculation shows that your electrical service has ample amperage capacity, but your breaker box is physically full, you face a space problem rather than a power problem.
One common remedy is using tandem breakers, often called skinny or half-height breakers. These specialized components allow two independent 120-volt circuits to occupy the physical space of a single standard breaker slot, freeing up room on the panel busbar for a full-sized, double-pole 240-volt breaker. Your panel label must explicitly indicate that it is rated to accept tandem breakers; installing them in non-rated slots violates electrical code.
If your panel does not accept tandems or requires multiple new circuits, installing a subpanel adjacent to the main breaker box is the standard industry practice. The electrician installs a large feeder breaker in the main panel and runs feeder wire to the subpanel, creating eight to twenty new slots for branch circuits.
Deploying Dynamic Load Management and Smart Energy Devices
Upgrading a utility service drop can sometimes be cost-prohibitive, particularly if utility transformers are undersized or incoming lines are buried beneath concrete driveways. In these situations, smart energy management devices offer an intelligent workaround.
Energy management systems and smart splitters actively monitor your home’s total power consumption. When primary appliances like an electric clothes dryer, water heater, or central air conditioner power on, the system automatically dials back or pauses the power flowing to the car charger. As soon as the heavy appliance finishes its cycle, the device restores full charging speed to your vehicle.
Because the system guarantees that total electrical demand never exceeds the service threshold, electrical inspectors frequently permit high-amperage charger installations on existing 100-amp or 125-amp panels without requiring an expensive utility service upgrade.
Another option is selecting an EV charger equipped with adjustable amperage settings. Many modern charging stations feature internal dip switches or software configurations that allow you to derate the unit. If your panel cannot support a 48-amp charge rate on a 60-amp circuit, you can easily configure the station to pull 24 amps on a 30-amp circuit or 16 amps on a 20-amp circuit. A 24-amp Level 2 charge still adds roughly 15 to 20 miles of range per hour, which easily replenishes an everyday commute overnight.
Hardwired vs. Plug-In Installations: Choosing the Right Path
When preparing your panel, you must decide how the charging station will connect to the branch circuit. Homeowners can install a heavy-duty 240-volt receptacle, such as a NEMA 14-50 outlet, or wire the charging station directly into the electrical box.
The Plug-In Approach
Plug-in installations offer flexibility. If your charging unit ever malfunctions, you can unplug it and send it for warranty service without opening your electrical panel or hiring a contractor. If you relocate, you simply take the charger off the wall and pack it in your trunk.
Plugging in comes with specific requirements under current residential electrical codes. In most jurisdictions, any 240-volt outlet installed in a garage or on an exterior wall must be protected by a Ground-Fault Circuit-Interrupter (GFCI) circuit breaker in the panel.
This introduces a common mechanical issue known as nuisance tripping. Most modern EV charging stations already incorporate sensitive internal GFCI diagnostic software. When a charger with built-in ground-fault monitoring is plugged into a circuit controlled by an external GFCI breaker, the two monitoring systems can interfere with one another, causing the breaker to trip randomly in the middle of a charging session.
Additionally, plug-in installations require commercial-grade receptacles. Inexpensive builder-grade 14-50 outlets designed for electric cooking ranges are meant for appliances that stay plugged in undisturbed and cycle on and off intermittently. Subjecting a budget receptacle to continuous high-amperage thermal loads over eight-hour stretches can cause the plastic casing to melt or scorch. Industrial-grade outlets built with heavy brass contact points are essential for safety.
The Hardwired Advantage
Directly hardwiring the charging station eliminates the outlet, the wall plug, and the secondary point of electrical contact altogether.
By eliminating the receptacle, hardwired installations do not require a GFCI breaker at the panel, completely removing the risk of nuisance tripping while preserving the station’s internal safety shutoffs.
Hardwiring also unlocks maximum charging performance. The National Electrical Code limits plug-and-cord vehicle chargers to a maximum continuous draw of 40 amps on a 50-amp circuit. If you want to take advantage of faster 48-amp charging speeds, your station must be hardwired directly to a dedicated 60-amp circuit using appropriately sized copper conductors.
Permitting, Professional Assessment, and Safety Verification
Because an EV charger is one of the heaviest electrical loads a home will ever sustain, treating the installation as a weekend DIY project carries substantial risk. Undersized conductors, improper wire insulation ratings, loose terminal connections, or incorrect torque settings create severe fire hazards.
Electrical connections undergo thermal expansion and contraction as high current cycles on and off. If terminal lugs on the circuit breaker or charging station are not tightened using an accurate, calibrated torque wrench to the manufacturer’s exact inch-pound specifications, micro-gaps develop over time. These loose connections generate electrical arcing, extreme heat buildup, and damaged panel busbars.
Always secure local building permits for the installation. A professional electrical permit ensures that a municipal inspector independently reviews wire gauges, conduit routing, breaker sizing, and grounding paths before you initiate your first charge. Permitted, inspected work preserves your home insurance coverage and provides peace of mind that your residential charging system is completely secure.
Building a Long-Term Energy Foundation
Preparing your electrical panel for an EV charger should not be viewed as an annoying logistical hurdle. It is a fundamental investment in the value, safety, and operational capability of your property.
Whether your path involves a straightforward breaker addition, the installation of a smart load-management monitor, or a comprehensive 200-amp service replacement, approaching the project with proper planning pays dividends. By matching your charging equipment to your home’s true capacity and prioritizing quality installation practices, you create a seamless, reliable home charging setup that keeps your vehicle ready for the road every single morning.